本文记录了我如何使用Conda搭建并管理多个Python运行环境
阅读本文需要您会简单的Shell操作.完成动手实验需要有一台运行Window/Linux/MacOS之一的电脑。
C 缘起
也行您会编写Python程序,也许您不会。这都不重要——互联网上有别人开源的程序,能够帮助我们完成以前无法完成的任务,或者提高工作效率,或者带来更好的体验。HelloGithub上面的项目就玲琅满目,任君采撷。
但是有一个问题:我手头的Python程序需要的环境不一,甚至互相冲突:
比如我有一个基于人工智能的程序,从歌曲音频中去掉人声只保留伴奏甚至只保留某种乐器的,它需要指定Python版本和某些模块;
再比如我有另一个基于人工智能的程序,分析视频中的人行走的步态,它需要另一个Python版本和某些模块;
然后我还有一个脚本,分析.m3u8并下载视频文件然后拼接的,它需要另外的Python版本和另外一些模块。
我们就会遇到不同项目需要的版本互相冲突。

(图片来自网络)
这种有缘有故不共戴天的程序们,能不能和平相处呢?
答案就是给他们量身定制,建立各自的Python运行环境。
Dm Conda 简介
简介
Conda是一个命令行工具,它把Python所需要的所有东西都视作软件包,甚至Conda自身也被作为一个软件包管理,用户(咱们)获取软件包的过程无编译,只是下载;另外它提供了虚拟环境的管理。
我是用的是Miniconda,它与Anaconda的区别与本文无关,不赘述了。
Em Conda 安装
下载
Conda支持的系统有御三家:Windows、Linux、macOS。
Linux(包括WSL,下同)和macOS都是启动一个终端:
1
2
3
| wget "https://repo.anaconda.com/miniconda/Miniconda3-latest-$(uname -s)-$(uname -m).sh" # Linux复制这行
wget "https://repo.anaconda.com/miniconda/Miniconda3-latest-MacOSX-$(uname -m).sh" # MacOS复制这行
|
假如访问它网站太慢的话也可以去清华大学开源软件镜像站下载。四舍五入就约等于是在清华学的IT技术。
1
2
3
| wget "https://mirrors.tuna.tsinghua.edu.cn/anaconda/miniconda/Miniconda3-latest-$(uname -s)-$(uname -m).sh" # Linux复制这行
wget "https://mirrors.tuna.tsinghua.edu.cn/anaconda/miniconda/Miniconda3-latest-MacOSX-$(uname -m).sh" # MacOS复制这行
|
Windows点这个:https://repo.anaconda.com/miniconda/Miniconda3-latest-Windows-x86_64.exe
或者镜像:https://mirrors.tuna.tsinghua.edu.cn/anaconda/miniconda/Miniconda3-latest-Windows-x86_64.exe
运行安装向导
Linux和MacOS
在终端输入:
1
| bash Miniconda3-latest-xxx-yyy.sh # 就是刚下载的文件
|
按回车然后按几下空格:
1
2
| Please, press ENTER to continue
>>>
|
按几下空格就有机会输入“yes”
1
2
| Do you accept the license terms? [yes|no]
[no] >>> yes
|
默认文件夹就挺好,还是按回车:
1
2
3
4
5
6
7
8
| Miniconda3 will now be installed into this location:
/yourhomefolder/miniconda3
- Press ENTER to confirm the location
- Press CTRL-C to abort the installation
- Or specify a different location below
[/yourhomefolder/miniconda3] >>>
|
让它帮我们初始化,主要是有关路径的环境变量,以方便随地启动:
1
2
3
| Do you wish the installer to initialize Miniconda3
by running conda init? [yes|no]
[no] >>> yes
|
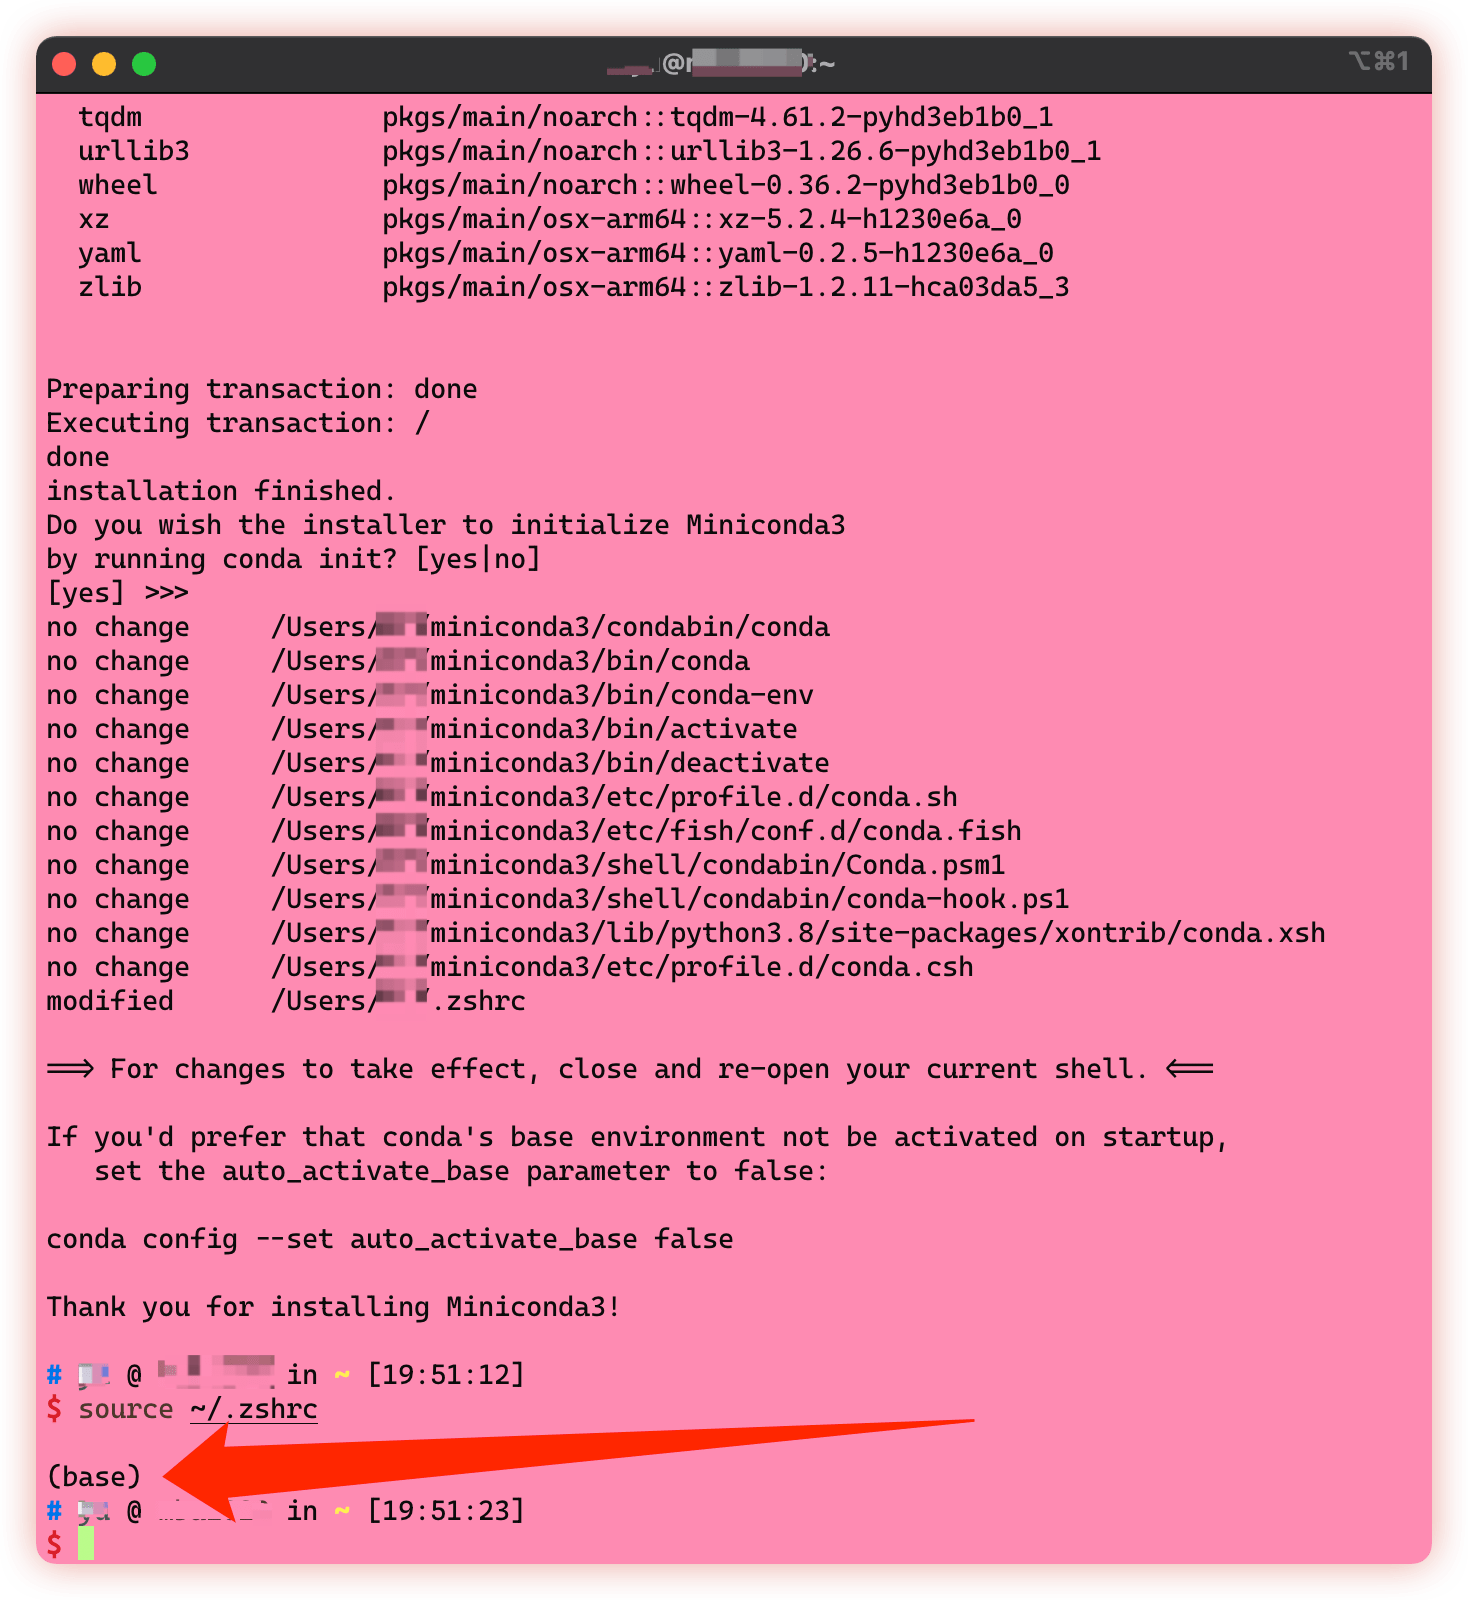
初始化完成之后关闭终端再打开或者:
这时应该注意到命令行左下出现了Conda的当前环境名,默认为“base”

也可以查看下安装向导给我们添加了什么环境变量值:
Windows
直接运行exe文件,一路都用默认设置即可。
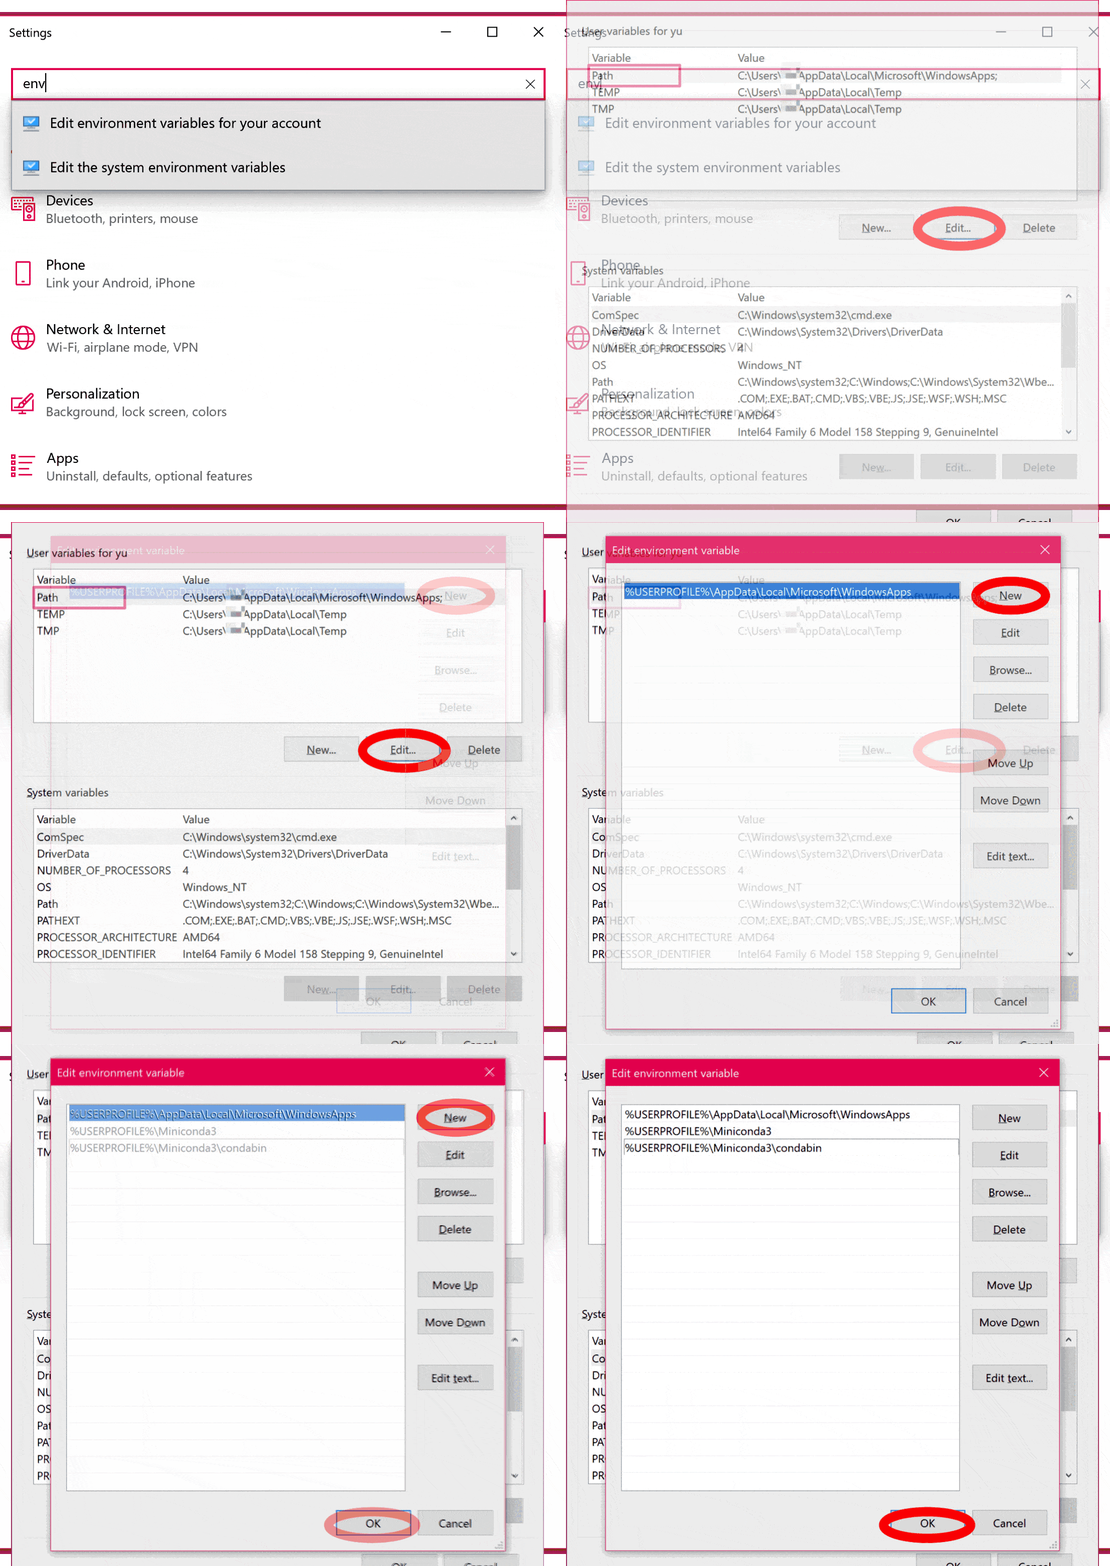
安装完毕后不要着急启动,先把环境变量之路径搞好:
点下设置(开始菜单里的齿轮)然后输入“env”,为当前用户修改环境变量。接下来编辑路径那里,加入%USREPROFILE\Miniconda3% 和 %USREPROFILE\Miniconda3%\condabin。之后需要注销再登录以生效。

安装后
为了验证下安装效果,Linux和macOS启动终端,Windows启动一个Powershell:
1
2
| python --version
conda info
|
对于网络不佳的用户,可以将仓库地址改为清华镜像:
Linux和MacOS:
Windows:
1
2
| conda config --set show_channel_urls yes
notepad ~/.condarc
|
~/.condarc 的具体内容为:
 1
 2
 3
 4
 5
 6
 7
 8
 9
10
11
12
13
14
15
| channels:
- defaults
show_channel_urls: true
default_channels:
- https://mirrors.tuna.tsinghua.edu.cn/anaconda/pkgs/main
- https://mirrors.tuna.tsinghua.edu.cn/anaconda/pkgs/r
- https://mirrors.tuna.tsinghua.edu.cn/anaconda/pkgs/msys2
custom_channels:
conda-forge: https://mirrors.tuna.tsinghua.edu.cn/anaconda/cloud
msys2: https://mirrors.tuna.tsinghua.edu.cn/anaconda/cloud
bioconda: https://mirrors.tuna.tsinghua.edu.cn/anaconda/cloud
menpo: https://mirrors.tuna.tsinghua.edu.cn/anaconda/cloud
pytorch: https://mirrors.tuna.tsinghua.edu.cn/anaconda/cloud
pytorch-lts: https://mirrors.tuna.tsinghua.edu.cn/anaconda/cloud
simpleitk: https://mirrors.tuna.tsinghua.edu.cn/anaconda/cloud
|
之后可以尝试更新:
1
2
3
| conda clean -i # 清除包缓存,新装用户不需要,仅适用于半途更改仓库地址的用户
conda update --all
conda update -n base -c defaults conda
|
F 使用
就是说咱们是要创建一个环境,需要的Python版本为3.6:
1
| conda create --name foobar python=3.6
|
列出所有环境:
切换到想要的环境,切换后注意左下角的提示信息:
在这个环境中安装需要的包:
有的项目会自带一个PIP的包列表,也可以直接用:
1
| conda install --yes --file requirements.txt
|
列出当前环境已安装的包:
升级当前环境已安装的包:
想要备份或者导出也可以:
1
| conda env export --file /yourpath/foobar_env.yml
|
想要恢复或者导入就是:
1
| conda env create -f /yourpath/foobar_env.yml
|
暂时不用可以先放一边:
确定不要了可以删除:
1
| conda remove -n foobar --all
|
好了。看过了就等于会了,享受开源的乐趣吧。
感谢观看。


